Posted on Saturday, 19th March 2011 by Grace
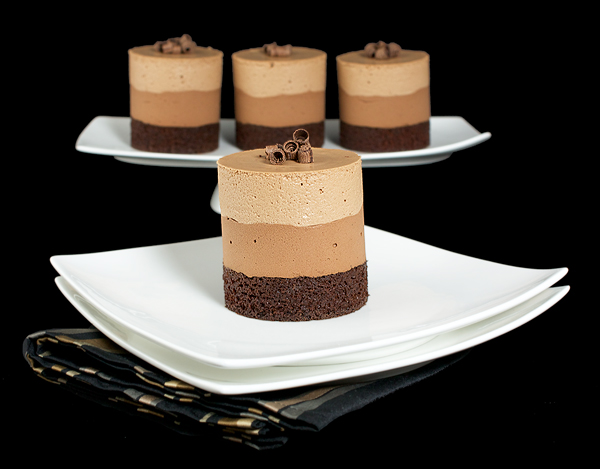
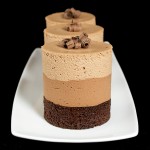
Chocolate, chocolate and more chocolate – try to resist these Triple Chocolate Mousse Cakes – “betcha can’t eat just one”!
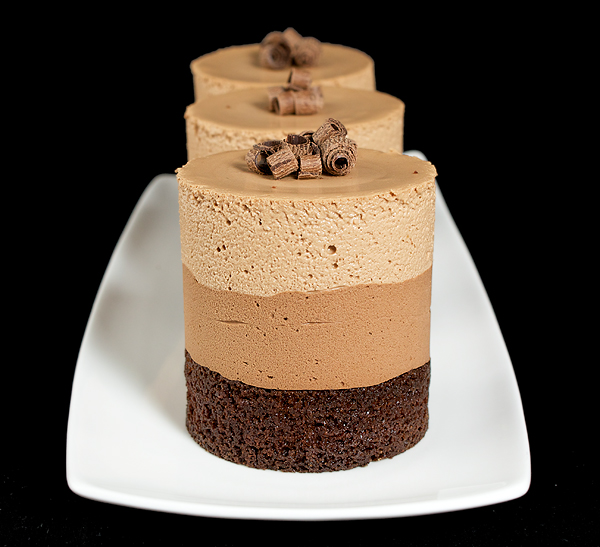
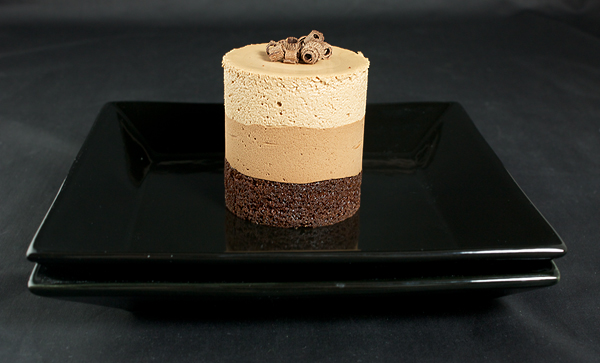
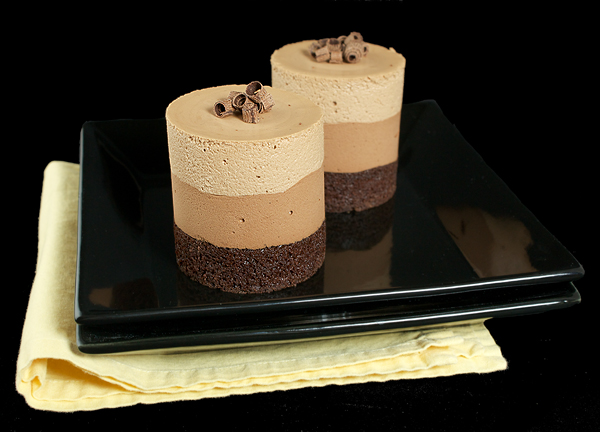
I’ve faced countless temptations since beginning my “Sweet” journey into desserts but none have been as irresistible as this one. The allure? – Three layers of sumptuous chocolate – Dark Chocolate Cake, lush Bittersweet Chocolate Mousse and pillowy Milk Chocolate Mousse.
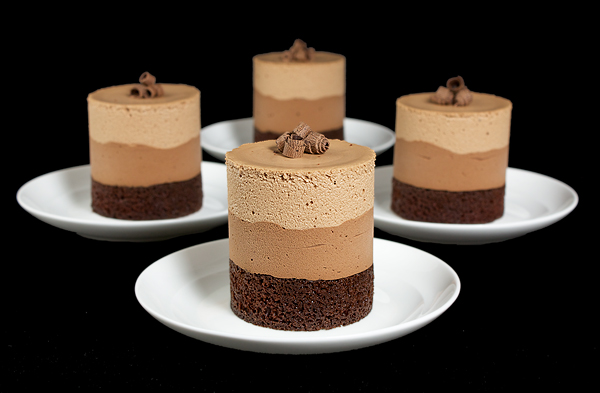
And the look? Spectacular! I first spotted these cakes many years ago when I received the Martha Stewart Living Magazine regularly. You won’t believe this but at the time I can remember thinking, “Why am I wasting my money on this magazine”? You see, five years ago, I would never have attempted any of the stunning cakes or dazzling desserts that graced the pages of that magazine.
But I believe there is a reason for everything, even a subscription to a magazine. I think at the time (even though I didn’t realize it) something inside me began to stir. A new and surprising passion was emerging. Who knew desserts were going to take my life in a new direction? A direction that’s given me “a sense of purpose” that I so desperately needed. And an opportunity to connect with so many wonderful people, like you!
Fast-forward all these years later and I am having the time of my life learning all about the wonderful world of desserts. I’m even learning a new vocabulary. Baking lingo such as fold, blind bake, temper, bain marie, and bloom (the list is endless) that was once foreign to me has become part of my day-to-day speech.
Any time I begin a new project (whatever it may be) I have a need to understand everything about it. I spend a multitude of hours researching and learning all that I can. At times it can be daunting. More than one person has told me that I am “obsessed” with desserts. I prefer the term “passionate”, don’t you?
So thank you for joining me on “La Mia Vita Dolce”, My Sweet Life. It’s been a remarkable experience and I’m glad you’re along for the ride!
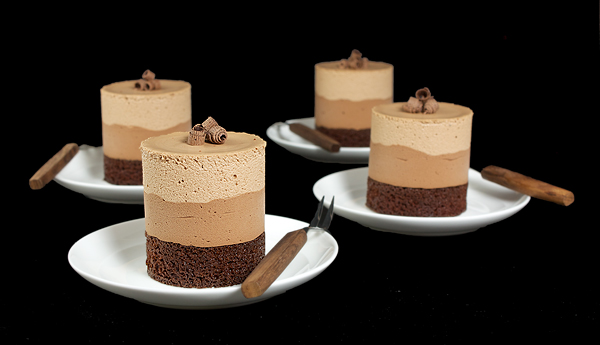
Triple Chocolate Mousse Cakes
(Recipe adapted slightly from )
Makes 8 cakes
**Special Equipment - 8 9-cm (3½-inch/6-ounce) ramekins
- Dark Chocolate Cake
- Bittersweet Chocolate Mousse
- Milk Chocolate Mousse
- Semisweet Chocolate Curls
Dark Chocolate Cake
- Unsalted butter, softened, to grease
- Unsweetened cocoa powder, for dusting
- 83 g (2/3 cup) plain (all-purpose) flour
- 39 g (1/3 cup) unsweetened Dutch-process cocoa powder
- ½ teaspoon baking soda
- ¾ teaspoon baking powder
- ¼ teaspoon salt
- 150 g (2/3 cup) caster (superfine granules) sugar
- 1 large egg, room temperature
- 59 ml (¼ cup/4 tablespoons) whole milk
- 3 tablespoons vegetable oil
- ½ teaspoon pure vanilla extract
- 59 ml (¼ cup/4 tablespoons) water
- Preheat oven to 180° C (350°). Line a baking sheet with non-stick baking paper. Place the ramekins on the lined baking sheet. Using a small pastry brush, coat the bottom and sides of each ramekin with unsalted butter; dust liberally with unsweetened cocoa powder, set-aside.
- Using a fine mesh sieve, sift the flour, Dutch-process cocoa powder, baking soda, baking powder and salt into the bowl of electric stand mixer. Add the sugar; using a whisk, whisk together to well combine.
- Attach the bowl to the mixer fitted with the paddle attachment. Add the egg, milk, oil, vanilla, and water; mix on medium-low speed until combined, about 3 minutes.
- Divide batter evenly among prepared ramekins. Return ramekins to lined baking sheet, spacing one-inch apart.
- Bake until a cake tester inserted in the centre of the cakes comes out clean, about 20 minutes.
- Transfer to a wire rack; let cool completely. Unmold cakes.
- Using a serrated knife, carefully trim each cake to 2.5-cm (1-inch) high. Transfer to paper lined baking sheet, cut side down.
- Cut eight 25.4-by-10.16-cm (10¾-inch-by-4-inch) strips of non-stick baking paper. Wrap a paper collar around the base of each cake, keeping the bottom flush with baking sheet. Secure each collar with tape, set-aside.
Bittersweet Chocolate Mousse and Milk Chocolate Mousse
- 789 ml (3 1/3 cups) heavy cream, 35%, divided
- 8 large egg yolks, room temperature, divided
- 113 g (½ cup) caster (superfine granules) sugar, divided
- 59 ml (¼ cup/4 tablespoons) light corn syrup, divided
- 59 ml (¼ cup/4 tablespoons) water, divided
- 198 g (7 ounces) good quality bittersweet chocolate, melted
- 2 teaspoons pure vanilla extract, divided
- Pinch of salt
- 198 g (7 ounces) milk chocolate, melted
- In the bowl of an electric stand mixer fitted with the whisk attachment, beat 394 ml (1 2/3 cups) heavy cream on medium-high speed until soft peaks form, about 3½ minutes. Transfer to an airtight container; refrigerate for 1 hour.
- Place 4 egg yolks into the clean bowl of an electric stand mixer fitted with the whisk attachment; beat on high speed until pale and frothy, about 5 minutes.
- Meanwhile, in a small-sized, heavy-bottomed saucepan, over high heat, bring 56.25 g (¼ cup) sugar, 2 tablespoons corn syrup and 2 tablespoons water to a rolling boil. Cook until clear, large bubbles form, about 1 minute.
- Reduce mixer speed to medium-low. Carefully and gradually pour hot syrup down side of bowl. Raise speed to medium-high; mix until slightly thickened, about 5 minutes.
- Remove bowl from mixer; add the melted bittersweet chocolate, 1-teaspoon vanilla, and a pinch of salt. Using a large flexible rubber spatula, stir to well combine.
- Remove the whipped cream from the refrigerator and place into a large-sized bowl. Add one-third of the bittersweet-chocolate mixture to the whipped cream; whisk until well combined. Add remaining bittersweet-chocolate mixture, whisking until well combined. Press the mixture through a large fine mesh sieve into a large bowl; discard any solids.
- Transfer bittersweet chocolate mousse to a large pastry bag fitted with a large, plain round tip.
- Repeat entire recipe, substituting milk chocolate for the bittersweet.
- Transfer milk chocolate mousse to a large pastry bag fitted with a large, plain round tip (If mousse is thin, do not transfer to pastry bag, use an ice cream scoop to spoon into paper collar – don’t worry it will set in the refrigerator. You can also pop the cakes in the freezer to give them a good set then remove collars and place in the refrigerator).
Assembling Triple-Chocolate Mousse Cakes
- Bittersweet Chocolate Mousse
- Milk Chocolate Mousse
- 57 g (2 ounces) semisweet chocolate, curls, to garnish
- Pipe a 2.54-cm (1-inch) layer of bittersweet chocolate mousse into each paper collar. Refrigerate until the mousse is set, about 20 minutes.
- Pipe a 2.54-cm (1-inch) layer of milk chocolate mousse on top of the layer of bittersweet chocolate mousse (if mousse is thin, do not transfer to pastry bag, use an ice cream scoop to spoon into paper collar – don’t worry it will set in the refrigerator). Refrigerate at least 4 hours and up to overnight.
- Microwave semisweet chocolate until slightly warm but not melted, about 30 seconds. Using a vegetable peeler, scrape edge of chocolate at a 45-degree angle, forming curls. Refrigerate the curls until ready to serve cakes.
- To serve; remove paper collars. Garnish with chocolate curls. Enjoy!
Related posts:
- Hot Fudge Sundae Cupcakes
- White Chocolate Mousse with Blueberry Compote Parfait
- Dark Chocolate Cupcakes with Peppermint Marshmallow Cream Filling
- Mini Blueberry-White Chocolate Cheesecakes
- Guinness Chocolate Cake with Chocolate Cream Cheese Frosting
Tags: after school treat, afternoon tea, cake, cakes, chocolate, chocolate dessert, chocolate frosting, chocolate icing, chocolate mousse, dessert, desserts, food, food photography, food photos, frosting, icing, individual dessert, individual desserts, Martha Stewart recipes, mini cakes, mini desserts, mousse, mousse recipes, pudding, small cakes
Posted in Baking & Pastry, Baking Mise en Place, Custards, Creams & Mousses, Eggs, Pastry Doughs & Batter, Recipes
Comments (31)
 Subscribe

March 19th, 2011 at 12:27 pm
These are gorgeous! Where do you find those paper collars? I can never find them
March 19th, 2011 at 12:49 pm
Your passion for desserts most definitely shines through your blog! These mousse cakes are absolute perfection.
March 19th, 2011 at 1:05 pm
OH WOW!!!! Not only do these look incredible, but they sounds just as fabulous.
March 19th, 2011 at 1:13 pm
Elyse I made them myself. I purchased acetate paper a while back and cut out the collars. But you can use non-stick baking (parchment) paper as well. I put the measurements for the collars in the recipe.
March 19th, 2011 at 1:36 pm
Fabulous! I’ve made three layered mousse before…but with dark, milk and white chocolate. I love the look of yours and will definitely try it…it would make a lovely Easter dessert!
March 19th, 2011 at 2:33 pm
Oh wow, these look fabulous. If it wasn’t nearly 7pm in England, I’d be making these right now. There’s always tomorrow! Thank you for sharing this recipe, they look stunning.
March 19th, 2011 at 4:32 pm
These are so pretty! I love chocolate mousse mmmm
March 19th, 2011 at 5:52 pm
Absolutely stunning! There is no way I’d be able to resist these.
March 19th, 2011 at 11:53 pm
These look amazing. I’m wondering if there is a way to do these bite sized for an event I have coming up. They would be so cute and tasty!!
March 19th, 2011 at 11:56 pm
Amazing!
March 20th, 2011 at 5:30 am
Wonderful!!! Those cakes are gorgeous!
March 20th, 2011 at 5:35 am
Nicole I think what I would do is bake the cake in a regular size baking tin rather than the individual ramekins. Then I would use a round cookie cutter to cut the cakes in the size you prefer. You can make the collar to fit the size of the cake and then fill the collars with the mousse. Most definitely doable. I am thinking of making them for my NIece’s upcoming bridal shower in mini, mini form.
March 20th, 2011 at 7:20 am
You are always making the most professional looking desserts but at the same time they look insanely delicious!
March 20th, 2011 at 7:37 pm
A girl can never have enough chocolate. These mousse cakes are perfect!
March 20th, 2011 at 7:37 pm
Gorgeous and delicious!
March 20th, 2011 at 8:12 pm
Beautiful pics! Looks amazing!
March 20th, 2011 at 9:20 pm
Oh holy BEAUTIFUL! WOOOOOOOOOOW!!!!!!!!!!!!!!!!!
March 20th, 2011 at 11:07 pm
WOW! Those look amazing. Definitely something a chocolate lover would indulge in.
March 21st, 2011 at 2:47 am
These are PERFECTION! I’m having breakfast at the moment, but I’d swap it in a second for a taste of one of these. They look so light and creamy and just heavenly.
March 21st, 2011 at 7:54 am
When my husband and I were in Disney World recently, we had a dessert similar to this. Three different kinds of chocolate with raspberry goo on top. I must say, these look even more delish!!! Yum!!!
March 21st, 2011 at 9:49 am
The only thing better than chocolate is TRIPLE chocolate! That looks sooo good! And I bet it tasted every bit as yummy as it looks!
Congrats on making Top 9!
March 21st, 2011 at 10:22 am
Wonderful chocolate mousse, loved the subtle three colors, its looking gorgeous !
March 21st, 2011 at 10:24 am
Heaven on a plate… you made my day!
Sherry Parfait
March 21st, 2011 at 10:24 am
Stunning cakes. I’ve tried before 2 chocolate mousse cake but using white chocolate instead of milk chocolate. Next time I’ll try your recipe. Thanks for sharing and congrats on Top 9
March 21st, 2011 at 11:31 am
These are GORGEOUS! I just adore them. Very impressive — great job! Love your blog.
March 21st, 2011 at 11:43 am
I love learning about food photography from other food bloggers. This picture is soooo beautiful! AND of course looks delicious:-)
Take care,
Terra
March 21st, 2011 at 1:13 pm
These are just beautiful! I absolutely love to cook but baking, especially something like this, is a bit unnerving to me.
March 21st, 2011 at 1:14 pm
These look great. Your first photo is the one I lean towards. What camera/lens are you using.
Congrats on Top 9
March 21st, 2011 at 1:21 pm
Wow!! Your photos are simply stunning! And the mousse cakes… well, no, there is no way I could stop at one. I have a recipe for something like this tucked away somewhere for a special occasion, but I think I’ll just print your version instead. Love it… Congrats on the Top 9!!
March 21st, 2011 at 1:38 pm
Thank you – the 18-55mm lens.
March 21st, 2011 at 1:40 pm
It was to me too but actually it wasn’t too bad, a few steps but really pretty easy.