Posted on Friday, 23rd August 2013 by Grace Massa Langlois
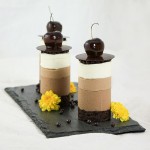
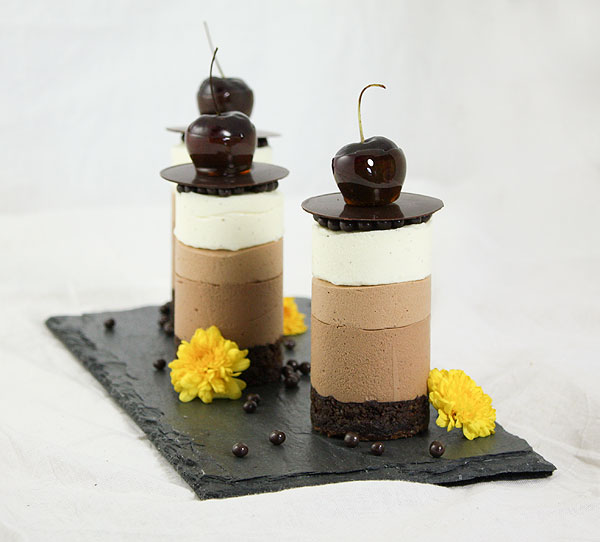
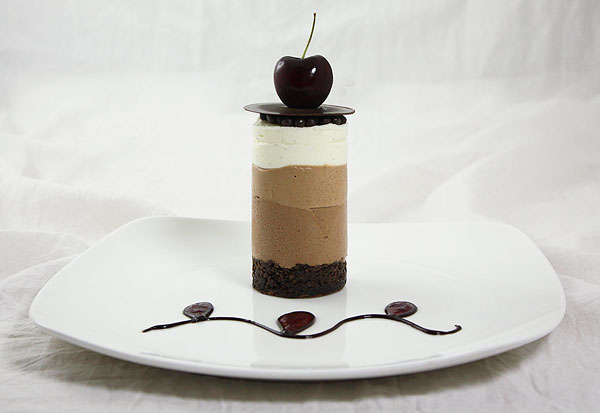
For the last month I’ve been testing various recipes and flavour combinations for an extra special dessert for an event I was hosting and I finally decided on these Mini Triple Chocolate Mousse Cakes with Grand Marnier Cherry Sauce. When it comes to stone fruit, my two favourites are peaches and cherries. Growing up our backyard was dotted with peach trees and I can’t tell you how much I miss freshly picked peaches, sliced and macerated in homemade red wine, mmm…yum!
We didn’t have cherry trees but luckily our neighbour, Mrs. Mascagni had a huge cherry tree that was always laden with dark red gems and thankfully, she shared generously. Recently I noticed the cherry tree was gone and I couldn’t help but feel sad. There are some things in life you grow to depend on and Mrs. Mascagni’s cherries were one of those things for me.
Cherries and almonds go really well together so I started the layering of the mousse cakes with a Torta Caprese. Torta Caprese is a traditional flourless chocolate and almond cake from Napoli. The cake is named after the Island of Capri where it originated. It’s often referred to as “uno dei pasticci piu fortunati della storia” or “one of history’s most fortunate mistakes”, the original baker forgot to add flour to the batter.
The cake is fudgy, moist and full of flavour. When processing the nuts to almond meal instead of processing to flour consistency I prefer to process to a texture similar to coarse breadcrumbs so that the cake provides a good textural contrast to the smooth mousse. To prevent the nuts from releasing oils when processing, process with some of the sugar called for in the recipe.
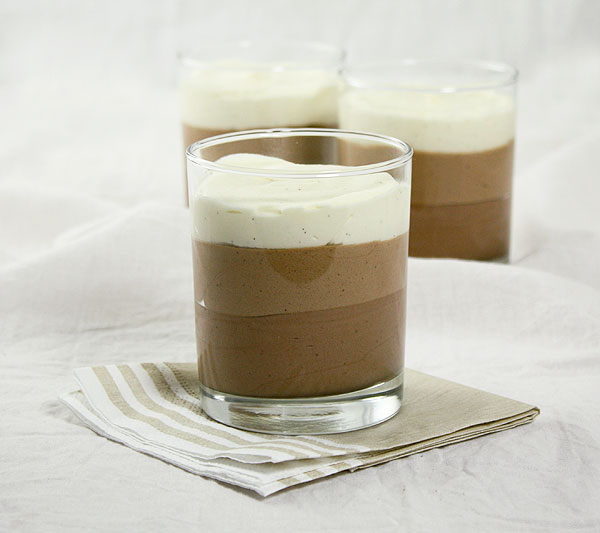
I chose to highlight cherries in this recipe because aside from going really well with almonds, cherries pair wonderfully with dark chocolate but also amazingly well with white chocolate too.
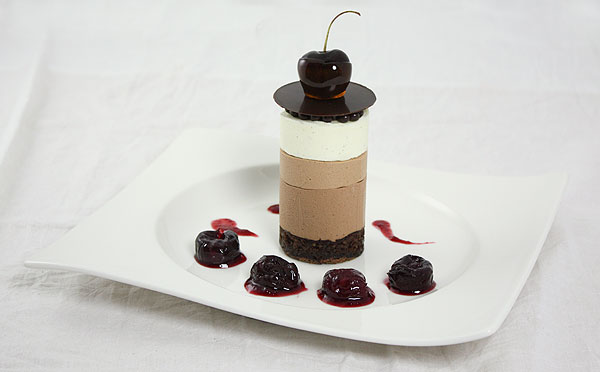
To balance off the sweet creamy richness of the white chocolate I layered the cakes with two chocolate intensities, Callebaut bittersweet, 70% cocoa solids and semisweet, 60% cocoa solids. I also used the bittersweet with some added dark cocoa in the Torta Caprese. When I’m making desserts like this one where chocolate is the main highlight I splurge on excellent quality chocolate, it makes a big difference in the taste and mouthfeel.
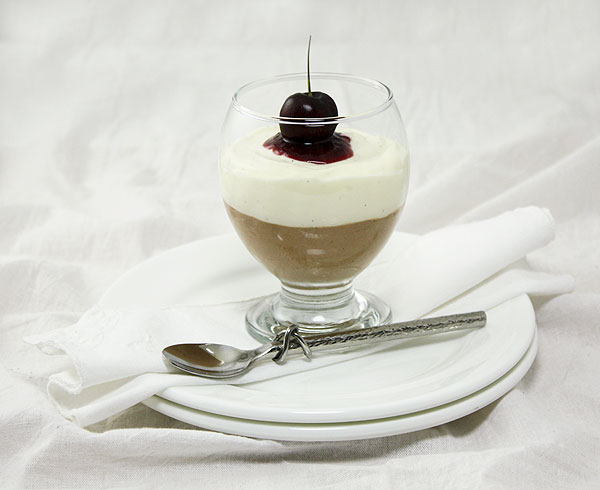
I’m always on the look out for different ways to decorate my mini cakes and when I was picking up my chocolate at the chocolatier I spotted the . I knew instantly that I was going to use them in some way to finish off the cakes because they would add crunch, a perfect contrast to the velvety mousse. Crispearls are pearl shaped beads that feature a toasted biscuit centre that has been enrobed in dark chocolate couverture. They have an exquisite aroma, they’re quite tasty and their pearl-like gloss make them ideal for adding a refined look to the dessert. They resemble tiny beads of caviar.
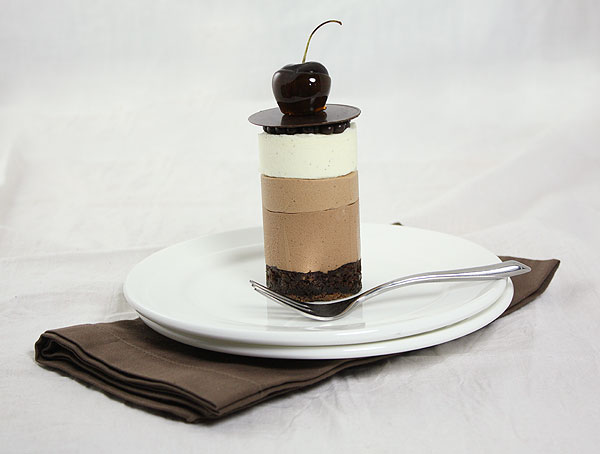
The Crispearls served as a bed for the chocolate tempered discs that I prepared. If you choose, they can also be folded into the mousse, which would provide an unexpected crunchy surprise. I can’t recall if I’ve shared a new product I’ve been using, . Mycryo, produced by Callebaut, is 100% cocoa butter in powder form and it makes the task of tempering chocolate so easy and simple to perform. I’ve tried many methods for tempering chocolate and to say I’ve struggled is an understatement, Mycryo is my saving grace, it works every time – thank you Callebaut!
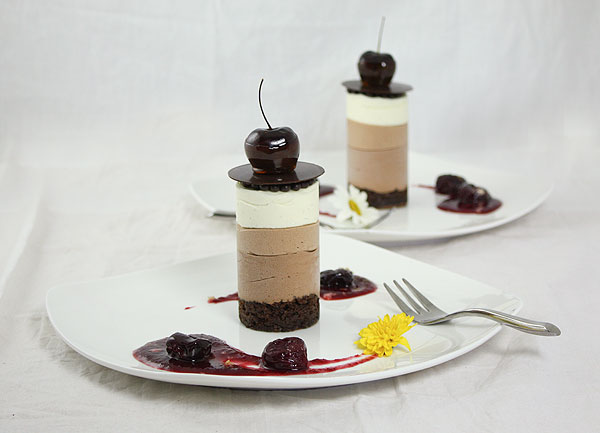
I wanted to bring some fresh cherries to the party, dipping them in caramel not only provided more texture but it also brought another flavour dimension to the dessert. Warning, they’re addictive, make extra, they’re so tasty. One thing to keep in mind when preparing the dessert, the caramel-dipped cherries should be made as close as possible to serving time. I tested with and without pits and although leaving the cherries in tact (and making sure I dried them well) prolonged the shelf life they still liquified rather quickly. The humidity could’ve played a factor but if you were preparing the cakes for a dinner party I wouldn’t take the chance on preparing them too early.
To add a little whimsy to the plate I sprinkled the cherry sauce with very pale yellow popping sugar (hardly visible although red would be better if it’s readily available). You could hear the crackle pop as I was serving the desserts but the guests didn’t realize what was causing the sound so the fizzy feeling on the tongue was an unexpected surprise. A tip for you, when it came time to serve the dessert, I arranged all the plated cakes on a serving tray and immediately before delivering them to the table I sprinkled the popping sugar over top because the sugar melts rather quickly when it comes in contact with the liquid.
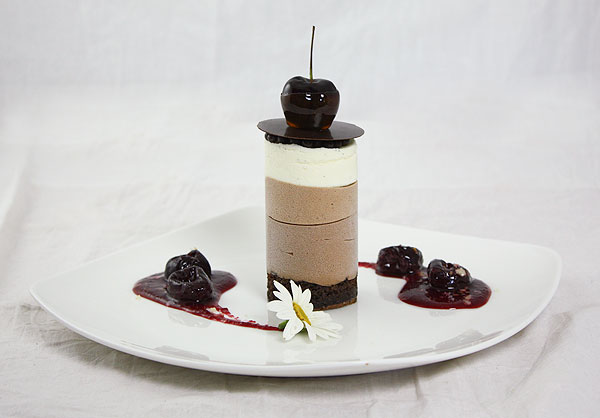
My sisters and I were in Toronto shortly before my event and I was very lucky to have run across edible flowers (thank you - wish we had a store in London). I’ve been hunting for them in my area but unfortunately I’ve never been able to find any. I think they’re so pretty, an elegant finishing touch.
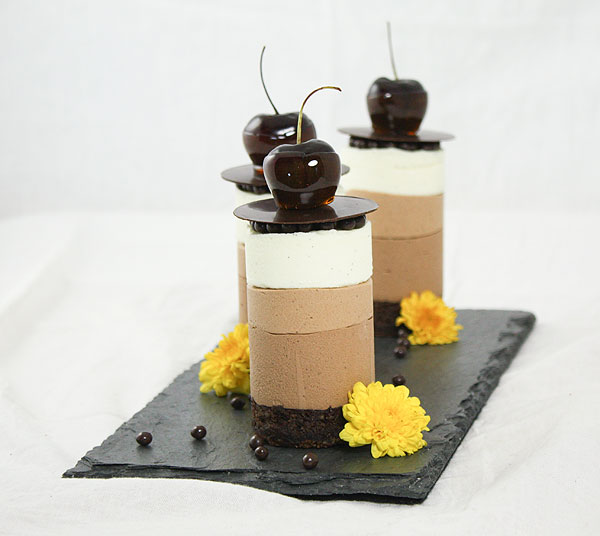
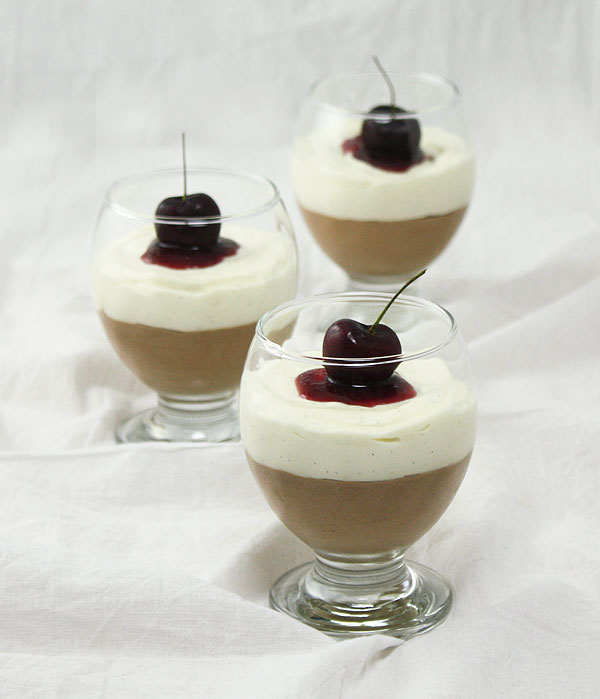
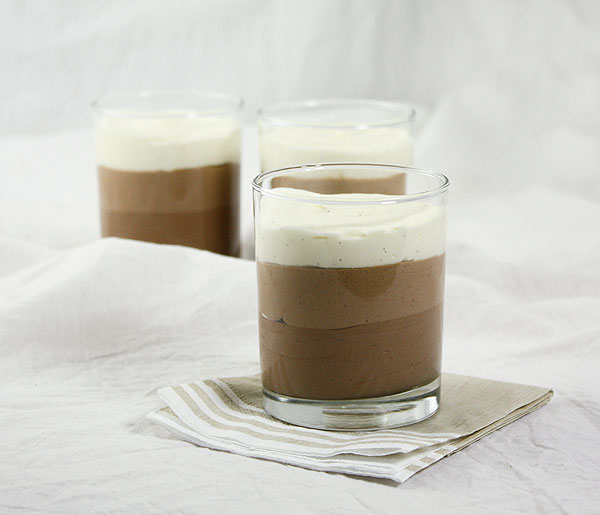
I was really pleased with the finished mousse cakes, they were a hit, and my guests really enjoyed them. There are quite a few elements to this dessert but if you’re looking for something special to serve these are well worth the effort. Serving the dessert in glasses is a simpler option but just as tasty.
Happy Weekend!
Mini Triple Chocolate Mousse Cakes with Grand Marnier Cherry Sauce
Makes 12 5 x 8 cm (2 x 3-inch) mini cakes and a few extra glass desserts
- Almond Torta Caprese
- Tempered Chocolate Discs, to decorate
- Extra Dark Chocolate Mousse
- Semisweet Chocolate Mousse
- White Chocolate Mousse
- Grand Marnier Cherry Sauce – Purée and Compote
- Caramel Dipped Cherries, to decorate
- Edible Flowers, to decorate
Almond Torta Caprese
Makes one 23 x 33 cm (9 x 13) cake and one 23 cm (9-inch) cake or 1 25 cm (10-inch)
If making one 25 cm (10-inch) cake increase baking time to 45 to 55 minutes.
- 200 g (about ¾ cup + 2 tablespoons) unsalted butter, extra for greasing tins
- 6 g (1 tablespoon) good quality unsweetened cocoa powder, sifted, extra for dusting tins
- 200 g (7 ounces) good quality dark chocolate, 60% or 70%
- 6 large eggs, separated
- 200 g (¾ cup + 2 tablespoons) caster (superfine) sugar, divided
- 300 g (2 cups) almonds, toasted
- ¼ teaspoon salt
- 16 g (1 package) or Yeast for Cake with Vanilla
- Preheat oven to 180° C (350°F). Using large pastry brush, grease one 23 x 33 cm (9 x 13 inch) rectangle-shaped baking tin and one 23 cm (9-inch) round baking tin with softened butter. For the rectangle-shaped tin, line the base and the two long sides with nonstick baking paper leaving 2½ cm (1-inch) overhang. Line the base of the round tin with nonstick baking paper. Dust both tins with cocoa powder tapping out any excess. (For this recipe only the larger cake will be needed. When the round cake is completely cooled, wrap in plastic then place in resealable plastic bag and store in the freezer for another use.)
- In large heatproof bowl set over saucepan of just simmering water, gently heat chocolate and butter over low heat until butter and chocolate are melted. Remove from heat, add the cocoa and stir to well combine. Set aside and allow chocolate mixture to cool slightly, 3 minutes.
- Meanwhile, place toasted almonds in food processor. Reserve 140 g (½ cup + 2 tablespoons) sugar and add the remaining 57 g (¼ cup) to the food processor bowl. Process nuts and sugar to coarse breadcrumb (not to flour consistency because you want the cake to have some texture). (Processing the nuts with some of the sugar prevents the nuts from releasing oils and turning into a paste.) Transfer to small bowl; add the salt and yeast for cake and whisk to combine well.
- Add the egg yolks to the melted chocolate mixture and stir to well combine with wooden spoon. Gradually add the reserved sugar, stirring to well combine.
- Add the almond meal mixture and stir to just combine.
- In medium bowl, using handheld electric mixer beat egg whites on high speed until soft peaks form.
- Add one third of the egg white foam to the chocolate mixture and stir to combine well, this will loosen the mixture.
- Using large flexible spatula fold the remaining egg white foam in two additions into the chocolate mixture, folding until just combined.
- Transfer about two-thirds of the batter to the larger tin and the remaining one-third to the round tin. Tap each tin on the counter to release any air bubbles that may have formed. Bake each cake, rotating tin halfway through baking, until a cake tester inserted in the centre comes out with a few moist crumbs attached, 15 to 17 minutes.
- Remove from oven and transfer to wire rack. Allow cake to cool in tin on wire rack, 10 minutes. Carefully invert to wire rack lined with baking paper and allow cakes to stand, upright, until completely cooled.
- Cut twelve 8 x 8 cm (3 x 3-inch) nonstick baking paper squares and arrange on rimmed baking sheet. Place one ring mould on each baking square. Line ring moulds with acetate paper collars or nonstick baking paper collars making sure the collars extend 2½ cm (1-inch) above the rim, set aside.
- Cut twelve cake rounds using cookie cutter (same size as the ring moulds). Place one round in the base of each mould. Cover the moulds with sheet of baking paper to prevent drying out the cakes and set-aside. Prepare Extra Dark Chocolate Mousse.
Extra Dark Chocolate Mousse
- 395 ml (1 2/3 cups) heavy cream, 35%
- 4 large egg yolks
- 56 g (¼ cup) caster (superfine) sugar
- 30 ml (2 tablespoons) light corn syrup
- 30 ml (2 tablespoons) water
- 113 g (4 ounces) good quality extra dark chocolate, 70%, finely chopped then melted
- 1 teaspoon pure vanilla extract
- Pinch of salt
- In large bowl using handheld electric mixer, beat heavy cream at high speed until soft peaks form, about 4 minutes. Transfer to airtight container, cover and transfer to the refrigerator. Let chill, 1 hour.
- In large bowl, using handheld electric mixer, beat egg yolks at high speed until pale and frothy, about 5 minutes.
- Meanwhile, in small saucepan, bring sugar, corn syrup and water to a boil over high heat, stirring until sugar and corn syrup are dissolved. Stop stirring and continue to cook until clear, large bubbles form, about 1 minute.
- Reduce mixer speed to medium. Carefully and gradually pour the hot syrup into the egg yolk foam while beating consistently. Increase speed to high; beat until thickened, about 5 minutes.
- Add the melted chocolate, vanilla and salt to the egg yolk foam and stir to well combine with large flexible spatula.
- Remove whipped cream from refrigerator. Stir one-third of the whipped cream into the chocolate mixture (to loosen mixture) then fold the remaining whipped cream into the chocolate mixture in two additions.
- Press the mousse through fine mesh sieve into clean, large bowl and discard solids.
- Transfer mousse to large pastry bag fitted with large plain tip. Pipe 2½ cm (1-inch) layer of mousse on top of each of the cake discs. If necessary, use the back of a demitasse spoon to evenly spread mousse to edges of moulds. Cover the moulds with a sheet of baking paper and transfer to the refrigerator. Allow the mousse to set, about 1 hour. Transfer moulds to the freezer and allow mousse layer to chill until firm, about 15 minutes. Prepare Semisweet Chocolate Mousse.
Semisweet Chocolate Mousse
Recipe Note: The semisweet chocolate mousse is not as firm as the extra dark chocolate mousse because semisweet chocolate contains less cocoa butter. The more cocoa butter in the chocolate the firmer the texture of the mousse. If you’re not comfortable piping this layer because it’s not as firm, spoon the mousse in the moulds instead.
To prepare this mousse follow the instructions for the Extra Dark Chocolate Mousse. Also, use the same ingredients as above but replace the extra dark chocolate with good quality semisweet chocolate, 60%. If you like, prepare the whipping cream for both batches at the same time (but this is the only preparation that can be done in advance). Pipe 2½ cm (1-inch) layer of mousse on top of the firm extra dark chocolate mousse. Cover the moulds with a sheet of baking paper and transfer to the refrigerator. Allow the mousse to set, about 1 hour. Transfer moulds to the freezer and allow mousse layer to chill until firm, about 15 minutes. Prepare White Chocolate Mousse.
White Chocolate Mousse
- 6 g (3½ sheets) Dr. Oetker extra gold gelatine sheets
- 340 g (12 ounces) good quality white chocolate, finely chopped
- 590 ml (2½ cups) heavy cream, 35%, divided
- 1 vanilla bean, split and seeded
- Place gelatine sheets in small bowl of very cold water and allow sheets to soften, 15 minutes.
- Prepare ice water bath, fill large bowl half full with ice, cover ice with cold water.
- Place chocolate in large heatproof bowl and set over pan of just simmering water. Gently heat chocolate over low heat stirring occasionally until chocolate is melted.
- Reserve 415 ml (1¾ cups) heavy cream. In small saucepan, heat the remaining 180 ml (¾ cup) heavy cream, vanilla seeds and bean over medium heat until small bubbles begin to form around the edges of the pan. Remove from heat.
- Remove gelatine sheets from water, squeeze out any excess water, and add to warm cream; stir until sheets are dissolved.
- Strain the cream mixture through fine mesh sieve into melted chocolate, and stir to well combine. Discard solids. Place the bowl over the ice water bath. Chill, stirring occasionally, until the chocolate mixture is thickened and falls in ribbons.
- Meanwhile, in large bowl, using handheld electric mixer beat the reserved heavy cream at high speed until soft peaks form.
- Remove chocolate mixture from ice water bath. Stir one-third of the whipped cream into the chocolate mixture (to loosen) then fold the remaining whipped cream into the chocolate mixture in two additions with large, flexible rubber spatula.
- Press the mousse through fine mesh sieve into large bowl and discard solids.
- Transfer mousse to large pastry bag fitted with large plain tip. Pipe a 2½ cm (1-inch) layer of mousse over the firm semisweet chocolate mousse. If necessary, use the back of a demitasse spoon to evenly spread mousse to edges of moulds. Cover moulds and return to the refrigerator. Allow mousse to set, about 1 hour.
- For best presentation, one hour prior to plating mini cakes, transfer to the freezer and allow the cakes to firm up, 30 minutes. This step will ensure easy removal of the paper collars. Once cakes are firm, immediately remove collars and transfer to the fridge to thaw, 15 minutes. Proceed to plating.
Tempered Chocolate Discs
Recipe Note: If you struggle tempering chocolate like I do (one task I can’t seem to master) I’ve found a wonderful product, Mycryo, which makes tempering chocolate very easy. Mycryo is 100% pure cocoa butter in powder form and Callebaut produces it. I am going to provide directions for tempering chocolate using the seeding method below but if you have Mycryo or you’re going to purchase please follow the tempering instructions for dark chocolate at the . Please note I am using 200 g (7 ounces) dark chocolate therefore add 1% Mycryo which is 2 grams to the chocolate after step 2 in the Callebaut instructions.
- 200 g (7 ounces) semisweet chocolate, 60%, very finely chopped
- You will require two baking sheets of the same size. Cut four strips of acetate paper measuring 40 x 10 cm (16 x 4-inches). Reserve two acetate sheets and arrange two sheets on one overturned baking sheet leaving as much space as possible in between, set aside. (Have another rimmed baking sheet ready to go.)
- To temper chocolate, place two-thirds chocolate (133 g or 4 2/3 ounces) in large heatproof bowl and set bowl over saucepan of just simmering water over low heat. Gently melt chocolate until it reaches temperature of 48° C (118° F).
- Remove from heat, add the remaining chocolate and stir until chocolate cools to temperature of 29° C (84° F).
- Set the bowl back over the simmering water and gently heat chocolate to temperature of 32° C (89° F).
- Immediately spread the tempered chocolate onto the acetate sheets using large offset spatula. Create a thin layer, about 1 to 2 mm thick (about 1/16 inch).
- Carefully transfer acetate sheets to the back of the reserved baking sheet and transfer to refrigerator. Allow chocolate strips to chill until almost set. Meanwhile transfer any chocolate remaining on the baking sheet to bowl and wash and dry baking sheet. (Do this quickly because it doesn’t take long for the chocolate to set. Make sure baking sheet is not hot, use cold water to wash sheet.)
- Remove chocolate strips from refrigerator and use 6 cm (2¼ inch) cookie cutter to cut 12 discs. Make sure to clean cutter in between cuts. Cover each chocolate strip with a sheet of reserved acetate paper. Place the clean baking sheet over top (essentially your sandwiching the chocolate discs between the baking sheets). Return to refrigerator and chill until completely set.
Cherry Sauce – Cherry Purée and Cherry Compote
Recipe Note: I picked up an amazing tip, which would work wonderfully in this recipe because it ties in the almond flavour from the cakes (wish I could remember where I got the tip). When you crush cherry pits they give you an almond flavour. I gave the tip a try. I crushed the pits with a hammer (that was quite the task), wrapped them in cheesecloth and dropped the bundle into the cherry compote and purée. It did give off a mild almond flavour but I didn’t get as deep an almond flavour as I would’ve liked but considering the short cooking time in both the purée and compote I was satisfied with the amount of almond flavour I was able to extract. It’s purely optional in both elements but give it a try if you’re curious and keep it in mind for other things, like cherry jelly or jam.
Cherry Purée
- 400 g (about 14 ounces) fresh sweet cherries
- Juice and finely grated zest of 1 medium orange (about about 60 ml or ¼ cup)
- 60 ml (¼ cup) water
- ½ leftover vanilla pod
- ¼ teaspoon Makera or Vietnamese cinnamon
- 60 ml (¼ cup) Grand Marnier or Brandy, optional (add an extra 2 tablespoons water and an extra 2 tablespoons orange juice)
- Wash, pit and stem cherries. If using, reserve pits and transfer to resealable plastic bag. Cut the cherries in four and place in small saucepan. Place the bag of pits on cutting board and crush them with a hammer. Place the crushed pits in cheesecloth, tie to secure and add to the saucepan (this step is optional – see recipe note).
- Pour the orange juice and water over the cherries and add the vanilla pod and cinnamon, stirring to well combine.
- Cook over medium-high heat until cherries are very tender, about 15 minutes. Add the liqueur in the last 3 minutes of cooking time.
- Remove from heat, remove pits (if using) and add the orange zest.
- If you feel comfortable processing hot mixtures, immediately purée the mixture either using stick blender or processing in blender, or food processor. If you don’t feel comfortable processing hot mixtures, set aside to cool, 5 minutes then process.
- Strain the mixture through fine mesh sieve into heatproof container. (I like to strain it a few times to ensure a smooth purée.)
- Let stand at room temperature until cooled completely then cover and refrigerate to chill until plating mini cakes. (For best flavour, remove the purée from the refrigerator 30 minutes prior to plating to allow it to come to room temperature.)
Cherry Compote
- 85 g (¼ cup + 2 tablespoons) caster (superfine) sugar
- 30 ml (2 tablespoons) water
- 400 g (about 14 ounces) fresh sweet cherries
- Juice from 1 medium orange (about 60 ml or ¼ cup)
- 30 ml (2 tablespoons) Grand Marnier or Brandy (optional, add an extra 2 tablespoons orange juice if you omit the liqueur)
- ½ leftover vanilla pod
- ¼ teaspoon Makera or Vietnamese cinnamon
- ½ teaspoon cornstarch
- Wash, pit and stem cherries. (I like to cover my hand over the pitter so that I catch the pit when it’s extracted so I can ensure the cherries are pit-free.) If using, reserve pits and transfer to resealable bag. Place the bag of pits on cutting board and using a hammer crush them. Place the crushed pits in cheesecloth, tie to secure, and set aside (this step is optional – see recipe note).
- To prepare caramel, in small saucepan, combine sugar and water. Cook over medium heat, stirring until sugar is dissolved. Stop stirring and continue to cook sugar syrup, swirling the pan occasionally and brushing down the sides of the pan with pastry brush dipped in water until golden amber colour.
- Add the cherries, orange juice, liqueur, vanilla pod and cinnamon and stir until caramel is dissolved (it will go hard but don’t worry it will dissolve). Add the bundle of pits.
- Cook until cherries are tender, about 7 minutes. When the cherries have cooked for about 4 minutes remove some of the juice and transfer to a heatproof bowl. Add the cornstarch and stir until it is dissolved. Pass through fine mesh sieve into the mixture and stir until well combined. Continue to cook for 3 minutes to cook the cornstarch out.
- Remove from heat and immediately transfer to heatproof container and then transfer to the refrigerator, uncovered, and allow it to chill until warm. Remove bundle of pits. (If not plating right away, remove from refrigerator 30 minutes prior to plating to allow compote to come to room temperature for best flavouring).
Caramel Dipped Cherries
I recommend preparing the caramel dipped cherries as close as possible to serving time because the caramel tends to liquefy. Depending on humidity levels, I recommend preparing no earlier than 2 hours prior to serving. If you prefer to pit the cherries, I would prepare no sooner than 1 hour before serving time (the natural juices tend to liquefy the caramel quicker).
- 24 stemmed sweet cherries
- 295 g (1¼ cups + 1 tablespoon) caster (superfine) sugar
- 80 ml (1/3 cup) water
- Wash and thoroughly dry cherries. (Do not pit because the juice will liquefy the caramel – make sure to advise guests that the cherries have the pits in them.) Line small rimmed baking sheet with nonstick baking paper.
- In small saucepan, combine sugar and water.
- Cook over medium heat, stirring until sugar is dissolved. Stop stirring and continue to cook the syrup over medium heat, occasionally swirling the pan (to even out colouring) and washing down sides of the pan with pastry brush dipped in water (to remove sugar crystals that form around the edges of the pan) until amber colour.
- Meanwhile prepare work surface (you must work quickly when dipping cherries otherwise the caramel may harden), place heat trivet on work surface (so that you can set the saucepan on top when dipping cherries) place prepared baking sheet on the work surface as well.
- When caramel is done, transfer saucepan to trivet. Dip each cherry in caramel covering about three-quarters of the cherry, let excess caramel drip off and transfer to prepared baking sheet. Repeat until all the cherries are dipped. (If the caramel hardens set over medium-low heat, do not stir the caramel but swirl the saucepan occasionally until the caramel is liquid again.)
To Plate Mini Cakes
If the crispearls, edible flowers or popping sugar (pop rocks) are not readily available, you can place the chocolate disc directly on the white chocolate mousse layer, then top with the caramel dipped cherry, this will look equally beautiful. I made these cakes for a special event and I wanted to add some extra special touches, the popping sugar provided a little whimsy to the plate. Instead of the crispearls you could always improvise and add some chocolate covered espresso beans or chocolate covered peanuts, try to locate something on the smaller side. The crispearls also add some texture, the cake layer and disc add texture already but again I wanted to add a few unexpected extras. The popping sugar I used was very pale in colour virtually naked to the eye, which was perfect because the tingle on the tongue was a surprise.
- , optional
- Edible Flowers, optional
- Popping Sugar (pop rocks), optional
- Carefully transfer individual cakes to dessert plates with offset spatula.
- Using tweezers, cover the surface of each cake with a layer of crispearls.
- Using tweezers, carefully place a tempered chocolate disc on top of the layer of crispearls. (It’s best not to handle the discs with your hands especially if you have warm hands.) If you don’t have tweezers quickly place the disc on top with small offset spatula. Top with caramel dipped cherry.
- Spoon cherry purée onto plate and use the back of the spoon to drag it across the plate. Using tweezers arrange a few cherries from the compote on top of the purée.
- Decorate with edible flowers and sprinkle with popping sugar.
- Buon Appetito!
Tags: afternoon tea, almond recipes, almonds, cake, cakes, cherries, cherry desserts, cherry recipes, chocolate, chocolate cake, chocolate dessert, chocolate desserts, chocolate mousse, chocolate recipes, dessert, desserts, desserts for entertaining, entertaining, food, food photography, food photos, fruit, Grand Marnier, individual dessert, individual desserts, layer cakes, layered cakes, mini cakes, mini layer cakes, mini mousse cakes, mousse cakes, pudding, small cakes, white chocolate, white chocolate desserts, white chocolate mousse, white chocolate recipes
Posted in Baking & Pastry, Baking Mise en Place, Basics, Cakes & Cheesecakes, Custards, Creams & Mousses, Dolci al Cucchiaio, Dolci alla Frutta, Eggs, Fillings, Frostings & Dessert Sauces, Fruit Desserts, Mini Desserts, Piccola Pasticceria, Recipes, Ricette di Base, Spoon Desserts, Torte
Comments (0)